The subject
Lightning occur during thunderstorms – apart from the dangers of a hunderstorm (floods, hail, storm, breaking branches, falling trees) lightning itself is dangerous, and potentially deadly. So don’t go outside when lightning is near. If 3 seconds pass between lightning and the accompanying thunder-clap the lightning was only 1000m away! More information on lightning can be found here:http://en.wikipedia.org/wiki/Lightning
Photography

Lightning occurs very fast and without prior warning, if you want to photograph lightning by pressing the shutter when you see one you will alway miss the flash.
Therefore the shutter already has to be open before the lightning occurs. During daytime the short exposure times necessary for a correct exposure means that you would have to take thousands, and thousands of pictures to capture one flash. To keep the number of exposures to a manageable level it is best to wait for darkness so the shutter can stay open for a couple of seconds.
Exposure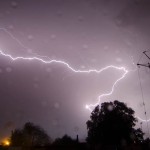
When photographing lightning you have to deal with mixed lighting conditions. Lightnings are very bright, like electronic flash
the exposure of the lightning is not affected by the shutter speed, but only by the f/stop and the ISO a camera is set to. I usually set
the camera to about f/8 and use an ISO sensitivity of 800, the ambient light determines the exposure time. If it is not completely dark I use the A setting, letting the camera determine the shutter speed. When it is dark I use an exposure time of about 5 to 15s, depending of the amount of light-sources in the frame. If you have to use shorter exposure times you will need to take many more images to capture lightning. If you go with a lower sensitivity setting you have to use a faster f-stop accordingly.
I suggest using the RAW mode instead of directly taking JPEG images as this gives you more freedome in exposure corrections afterwards.
Lens
The camera should be set to manual focus and focussed on infinity. I often use a distant street light or similar and use autofocus on such a target and
then set the focus to manual.
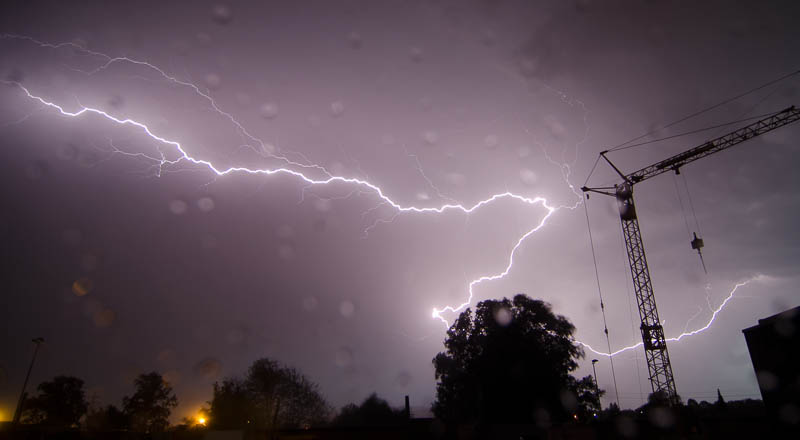
The focal lenght of the lens being used is determined by the proximity of the thunderstorm. Taking pictures of a remote thunderstorm means that you might not have to deal with rain!
When the thunderstorm is close enough so that a wide-angle becomes necessary make sure you and the camera are secure from rain, hail, sudden gusts of wind etc. Sometimes I shoot through a window to keep the camera dry. But then you have to make sure that the room is absolutely dark so that no reflections of lamps are visible in the window.
Tripod
The long exposure times necessary when shooting in the dark make a tripod a necessity. As you might leave the camera alone for a while make sure everything is tightly locked down as a clamp might come loose and the camera could topple over.
Number of images
To increase the chance of actually getting an image of lightning it is necessary to shoot as many pictures as you can. Luckily some cameras have a built-in intervalometer which allows for shooting of time-lapse animations. To maximise the time the shutter is actually open I set the built-in intervalometer of my Nikon cameras to 1s, so that the camera keeps shooting almost continuously.
If you don’t have an intervalometer option you can try to set the camera to continuouse shooting and use a rubber band to keep the shutter pressed.
In my experience for about 100 exposures there is one good enough to make it worth keeping.
Summary:
- Focus the lens to infinity
- Set the f/stop to f/8
- Set the sensitivity to 800
- Use a tripod
- Wait until darkness sets in and the exposure time is longer than a second
- Use interval shooting or a remote control to take as many pictures as you can